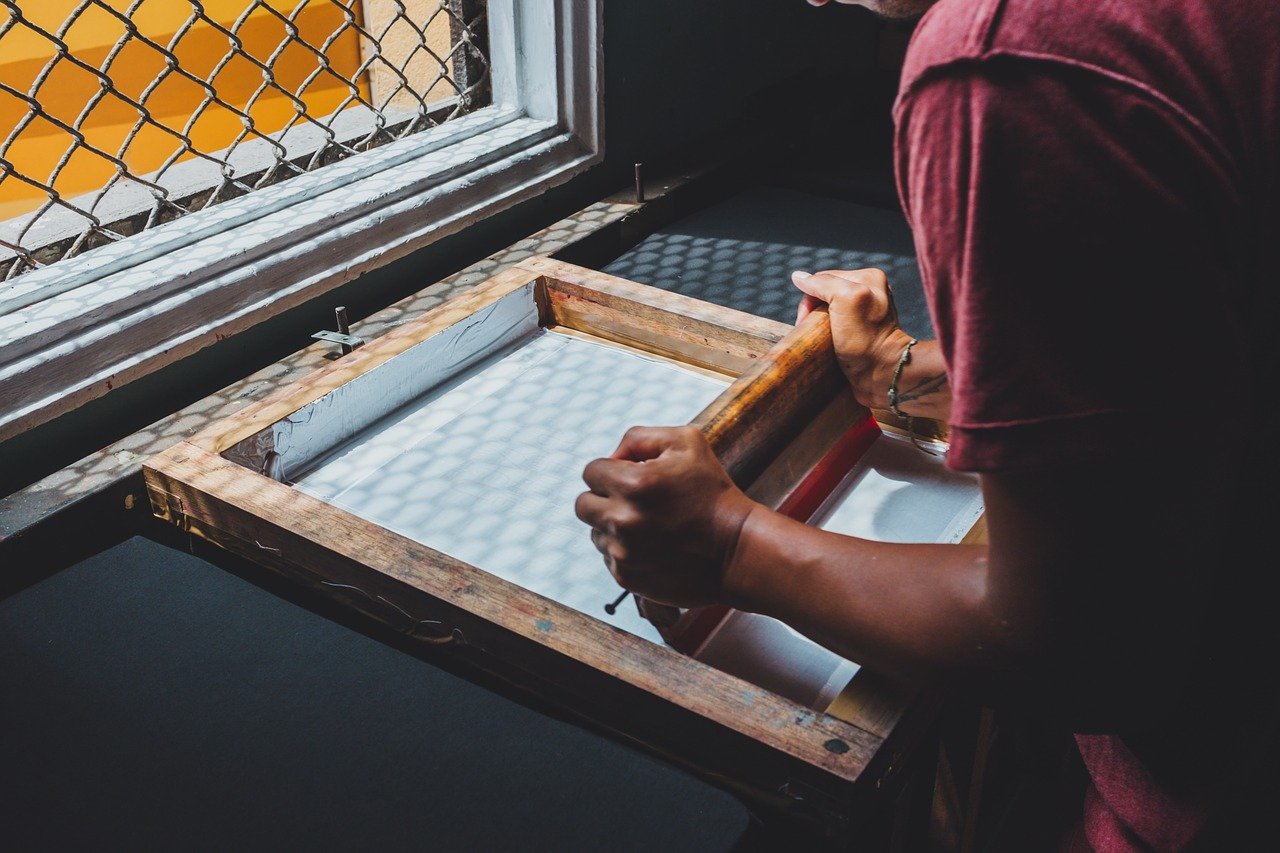
Screen printing is the process of pressing ink through a stenciled work/mesh screen to make a printed plan or design. It is a well-known method utilized in an entire scope of different industries, so regardless of whether you’ve never known about the term before today, you’ve likely worn or used a screen-printed item at one point in time without you realizing it. The procedure is sometimes called serigraphy or silk screen printing, however, these names allude to the same basic method.
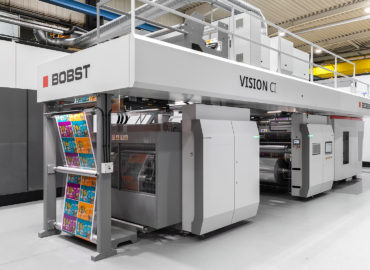
Screen printing is different when you compare it with other printing technology, for example, offset printing. Screen printing is used when you want to work on multiple packaging products such as paper boxes, paper cups, glass bottles, and jars. 100 to 1000 pieces is usually the minimum order quantity when dealing with screen printing, but offset printing is generally used for printing products such as paper boxes, books, etc. Flexographic printing is also another type of technological printing whereby you can print directly on a corrugated board before it is converted into a box.
What is Screen Printing?
Screen printing is the process of transferring a stenciled design onto a leveled surface using a mesh screen, ink, and a squeegee. Paper and fabric are commonly used screen-printed surfaces, but it uses with specialized inks, and it is also possible to print on wood, plastic, metal, and even glass. This method makes a stencil on a fine mesh and it pushes the ink through afterward to make an imprint of your design plan on the surface underneath.
As mentioned earlier this process is sometimes called silk screen printing, and keeping in mind that the actual printing process is in every case fairly similar, how the stencil is made can differ, depending on the materials used. The different stenciling techniques include:
- The use of vinyl or masking tape to cover desired areas of the screen.
- Using ‘screen blockers’ such as lacquer and glue to paint the stencil onto the mesh.
- Using a light-delicate emulsion to make a stencil, which is developed in a familiar way to a photograph.
Designs made by utilizing the screen-printing technique may use only one shade of pink or a few. In the case of multicolored items, the colors must be applied in singular layers, utilizing separate stencils for each ink.
Why is Screen Printing Used?
One of the main reasons why the screen-printing technique is used widely around is because it produces vivid colors, and this is even on darker fabrics. The paint or ink also lies in layers on the surface of the paper or fabric used, and this gives the print a pleasing tactile quality.
This method is preferred because it permits or allows the printer to effortlessly reproduce a design several times. Since the same stencil can be utilized to repeat a design over and over, it’s extremely useful for making numerous copies of a similar garment or accessory. This makes screen printing an exceptionally proficient procedure for making large batches of custom clothing that can be used by sports teams or as work uniforms.
At the point when this is finished using professional equipment by an experienced printer, it is conceivable to make an intricate multicolored design. Even though the complexity of the process means there’s a limit to the number of colors the printer can use at a time, it allows more intensity in coloring than achieving this process with digital printing alone.
STEP-BY-STEP PROCESS OF SCREEN PRINTING
There are various strategies used in screen printing yet they all include a similar fundamental method. The type of printing about to be discussed uses an exceptional light-receptive emulsion to create a custom stencil; this will in general be the most well-known type of commercial printing, as it tends to be used to make intricate stencils. The step-by-step process of screen printing is as follows;
STEP 1: THE DESIGN IS CREATED
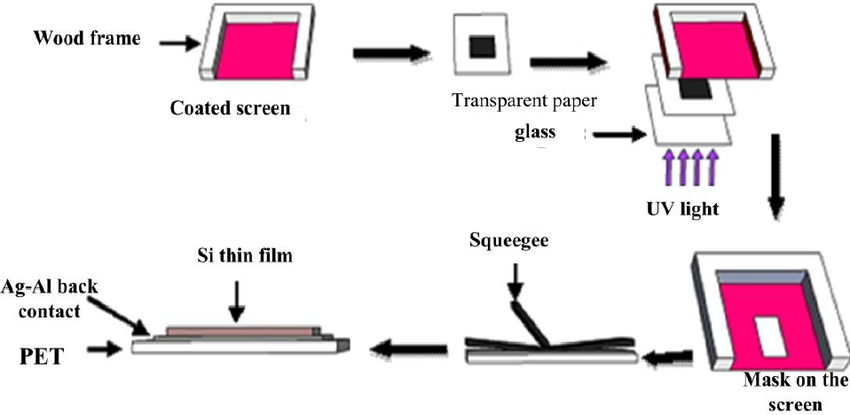
To begin, the printer takes the plan or design needed to be created based on the finished product, and prints in onto a transparent acetate film acid derivation film. This will be utilized to create the stencil.
STEP 2: THE SCREEN IS PREPARED
Next, the printer picks a mesh screen that suits the mind-boggling nature of the design, and the texture of the fabric that will be printed. The mesh screen is then covered or coated with a layer of light-responsive emulsion, which hardens when it is developed under bright light.
STEP 3: THE EMULSION IS EXPOSED
The acetate sheet including the design is laid onto the emulsion-covered screen, and the entire thing is exposed to bright light. The light is used to harden the emulsion, so the parts of the screen which remain covered by the design stay in liquid form.
On the chance that the last and final design is going to include more than one color, at that point a separate screen is used to apply each layer of ink. To create a multi-colored product, the printer uses his skills to design every stencil and lines them up perfectly to make sure the final design is seamless and consistent.
STEP 4: STENCIL IS CREATED BY WASHING OFF THE EMULSION
After the screen has been exposed for a set time, the parts of the screen that is not covered by the design will have turned hard. Any unhardened emulsion is deliberately rinsed away. This leaves an imprint of the design on the screen that is clear for the ink to pass through.
The screen is then dried, and the printer will make any essential touch-ups or amendments to make the imprint as precise as conceivable to the original design. The stencil is then ready to be used.
STEP 5: THE ITEM IS PREPARED FOR PRINT
The screen is set on the print machine, and the thing being printed is set down on a printing board, underneath the screen. There are different types of presses, this includes the manual and the automatic styles, but most of the modern commercial printers use an automatic rotary carousel printer, as this allows many different screens that work at once. For multicolored prints, the printer can be utilized to apply separate color layers with hardly a pause in between.
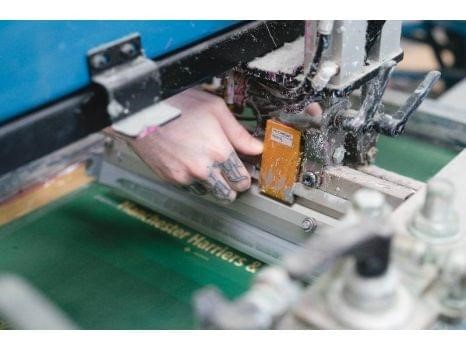
STEP 6: INK IS PRESSED THROUGH THE SCREEN ON THE ITEM
The screen is lowered onto the printing board. The ink is added to the top end of the screen, and the correct squeegee is utilized to pull the ink along the full length of the screen. This presses the ink through the open zones of the stencil, engraving the plan on the item underneath. If the printer is intended to print multiple items, the screen is raised and a new garment is placed on the printing board, and this process is repeated until all the items are printed.
When each item has been printed, and the stencil has served its planned need, the emulsion is removed utilizing an uncommon liquid, this is to guarantee that the mesh can be reused to make new stencils.
STEP 7: THE PRODUCT IS FINISHED AFTER DRYING AND CHECKING
The printed product is passed through a dryer, which creates a smooth colorfast finish by “curing” the ink. The final product is checked and washed thoroughly to remove any noticeable residue before it is passed on to the new owner.
Do you have any questions on screen printing like…
- How to prepare a screen?
- Where to find stencils?
- How much its costs?
- Which ink is good for screen printing?
- How to prepare ink for screen printing?
- How to make a frame for the screen?
Or anything in your mind related to screen printing, you can ask in below comment box. We will try to help you out.